My kids LOVE to hear me tell stories about when I was in school. Since they’ve only been in a cottage school setting, they don’t have any experience with 50 minute class periods, bells ringing, or teachers who were less than stellar.
“What classes did you take in high school? What was your FAVORITE?”
Looking back, there are a few teachers that stood out in my mind. Ones who made tedious subjects bearable, (I’m looking at you, Geometry teacher) and ones who took an interesting course and made it delightful.
I ended up with four years of science in high school, beginning with Intro to Chemistry and Physics, then ending up with Chemistry 101. (Taught by a very grumpy high school football coach. I detested every minute.)
Sandwiched in the middle was Biology and AP Biology II, taught by Mr Puckett. Picture Papa Keebler Elf, without the jaunty red hat. He helped us maneuver our way through dissection, and even though AP Biology II nearly did me in, I loved every moment. Dissecting pins, scalpels, and lab reports made me giddy.
After hearing unbelievable tales of how their mother dissected a gigantic cat her junior year in high school (not to mention fetal pigs in college), my children have been chomping at the bit ever since.
“Ahh! When will you let us dissect something?”
“Oh, please; oh, please, oh PLEASE!”
Rinse and repeat times ten times or so over the past few years.
I balked.
I whined.
I seriously did not want to take on this task. For real.
I mean, seriously, y’all.
Dissecting dead animals might have been sixteen tons of fun in high school, but bringing it into my own home seemed daunting. First, where does one buy a preserved frog? Next, wouldn’t it be a bit messy? Gross? Disgusting? Last, how would I keep EVERYONE happy? Buying 5 frog dissection kits didn’t sound like the best idea.
Once I discovered that my children were not going to let this rest, I started researching ways to experience dissection labs with minimal fuss.
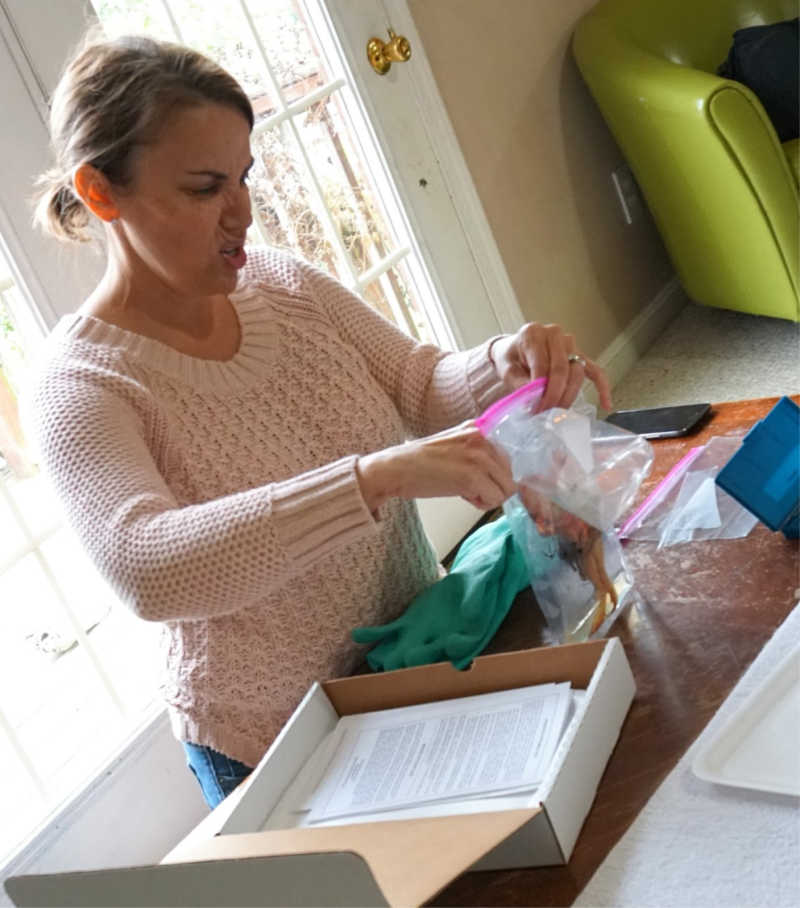
We received dissection supplies from Home Science Tools. I was compensated for my time, but information and experience expressed here is all my original work.
We chose an Introductory Dissection Kit from Home Science Tools.
It contained:
A dissection tool kit — including pins, scalpel and blades, scissors, forceps, acrylic ruler and pointy tools
3 preserved specimens: a frog, an earthworm, and a grasshopper
3 disposable dissection trays
Once we pulled the specimens out of the bag, Rachel was finished. She stomped off to her room, declaring that she had work to do, for the rest of her life. I didn’t pressure her, as I want science exploration to be a pleasant experience, not traumatic.
My boys, on the other hand? I could barely hold them back.
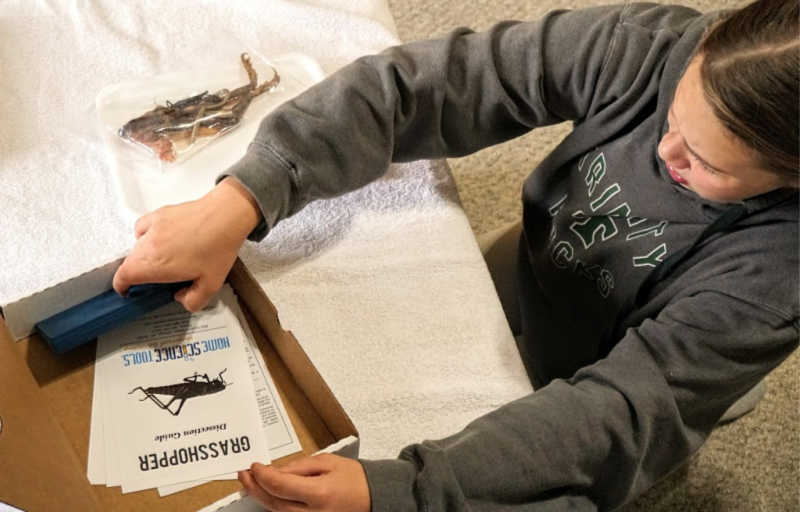
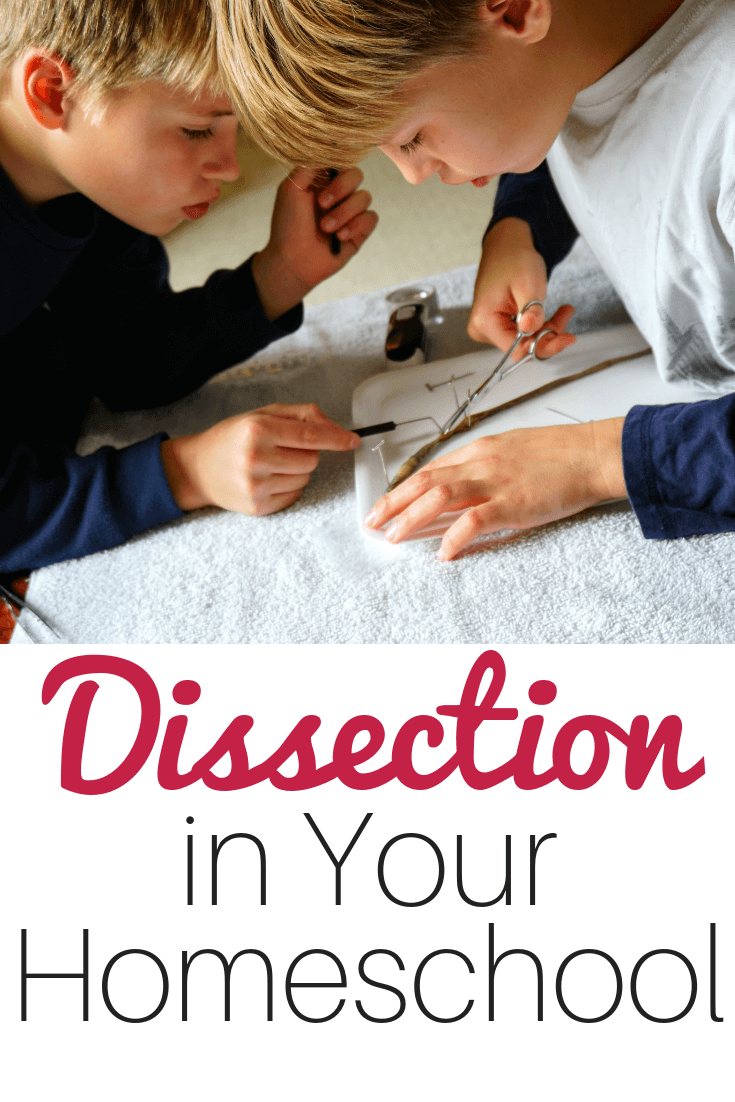
Adam claimed the earthworm, while Thomas chose the frog. I wasn’t planning on letting Daniel dissect anything. Once I saw how excited he was, I told the boys that the grasshopper belonged to him.
Getting Started with Homeschool Dissection
We cleared a space on my living room table and got to work.
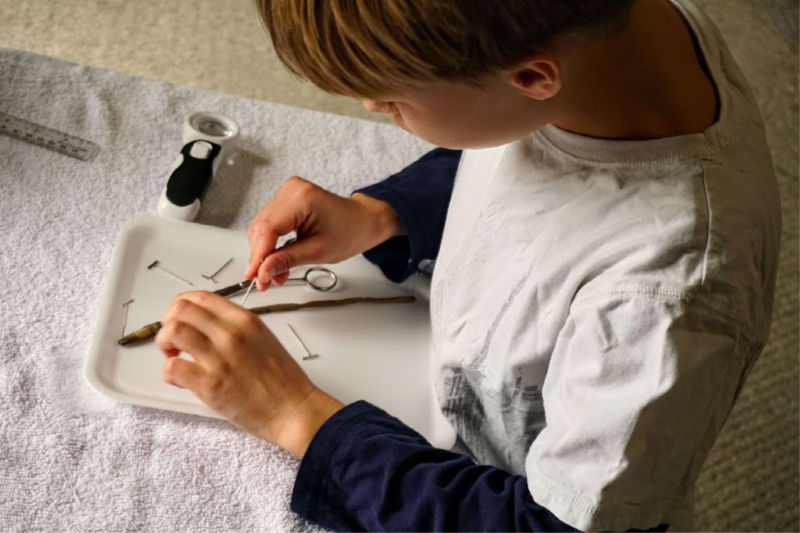
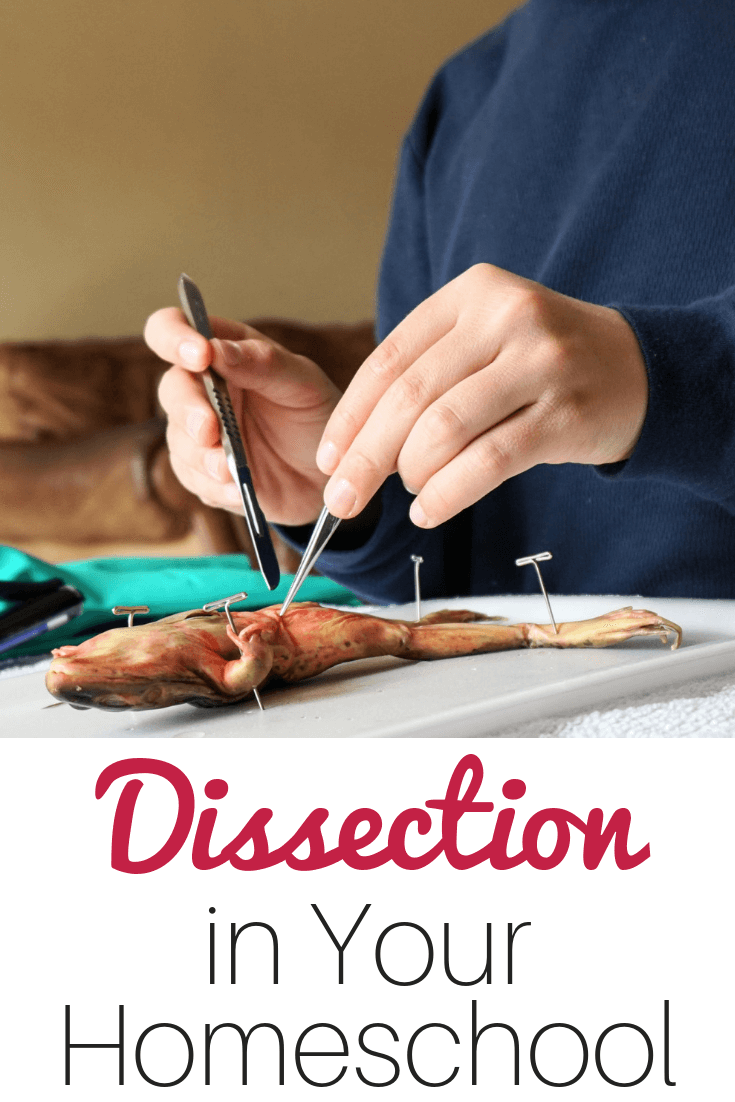
First, we checked out the tool kit. I explained the tools, what they were for, and how we use them. We also went over some basic safety rules, so that I could avoid a trip to the ER. (The scalpel blades are SUPER sharp!)
The dissection kit includes guides for dissecting each specimen. These guides have information about the animals, as well as photos and diagrams to explain the parts.
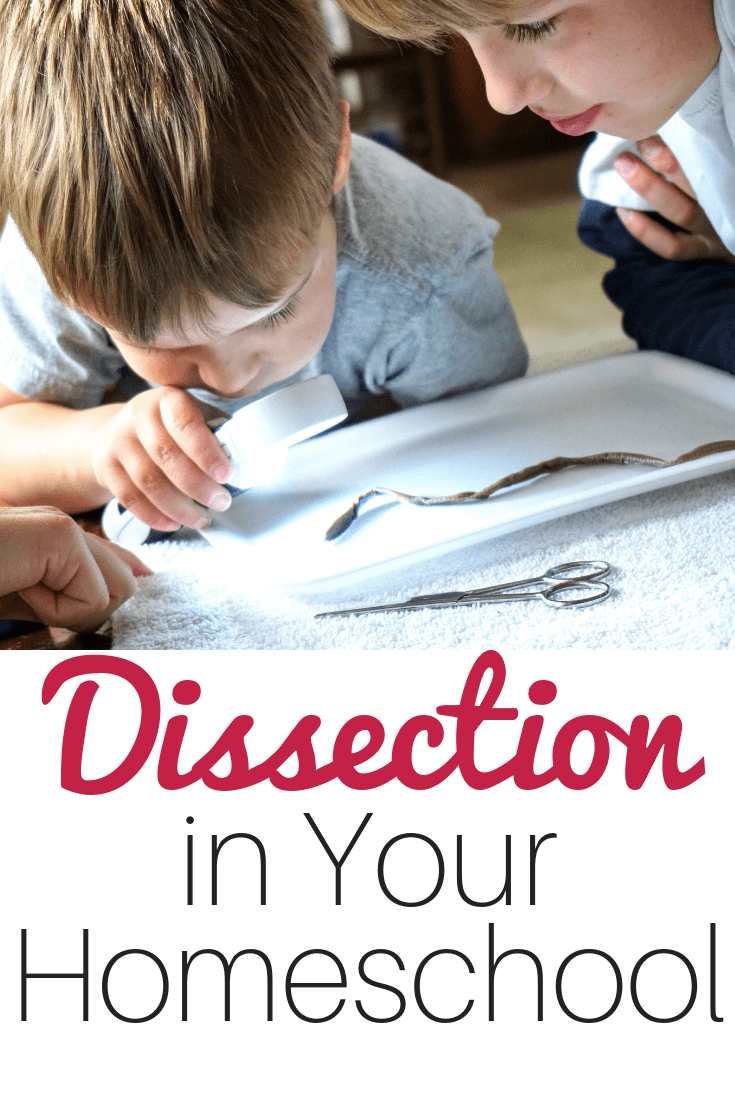
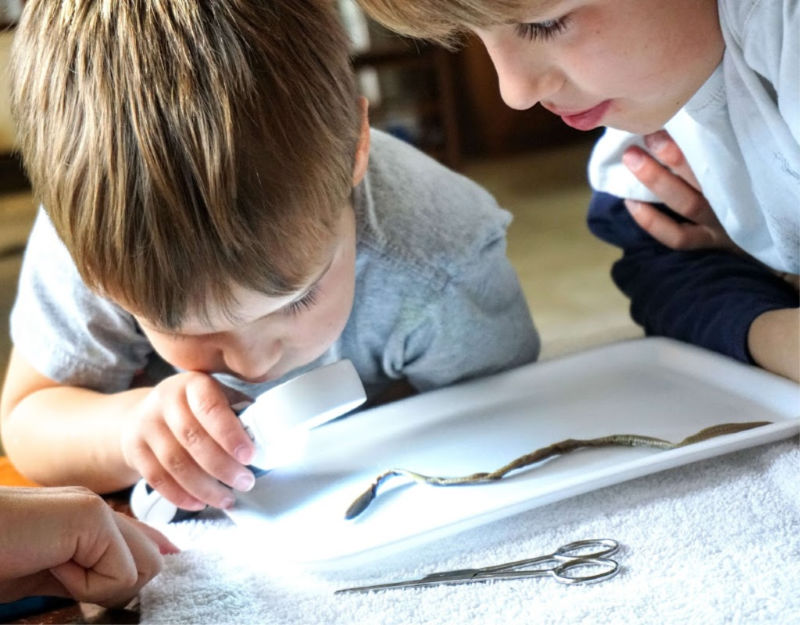
Then, we settled down to science business. Thomas wanted to jump right in with dissecting, but I reminded him that part of learning is investigating — taking the time to examine the animals BEFORE we cut them open. We took time to learn about the worm’s mouth, as well as his anus. (Plenty of poop jokes abounded there!)
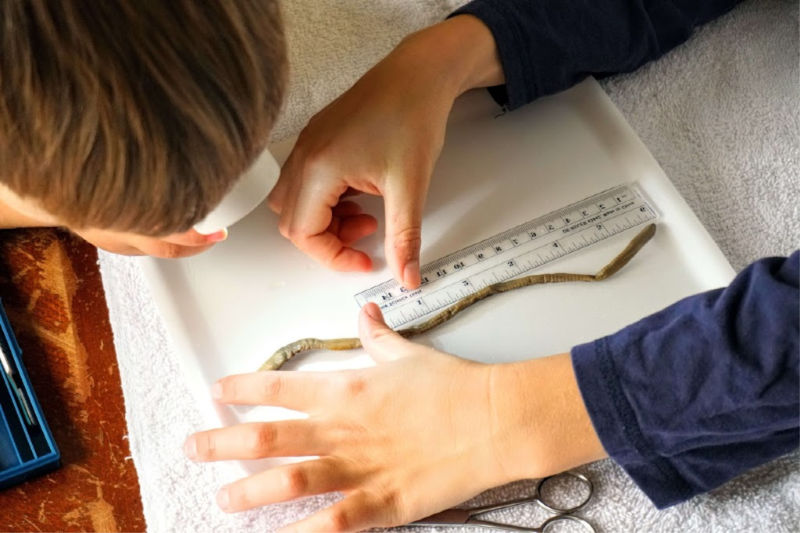
We measured the worm, and learned about the segments, as well as the differences between dorsal and ventral sides.
The difficulty of dissecting the worm was perfect for my 10 year olds. This takes a bit of patience and a steady hand, but you’ll also see quick results for your hard work. I LOVED the dissection guide that comes in the kit. It’s a simple pamphlet, but packed full of information. If you’re using it with multiple children, it might be a good idea to make a copy or two, so that everyone can take a look while you’re reading.
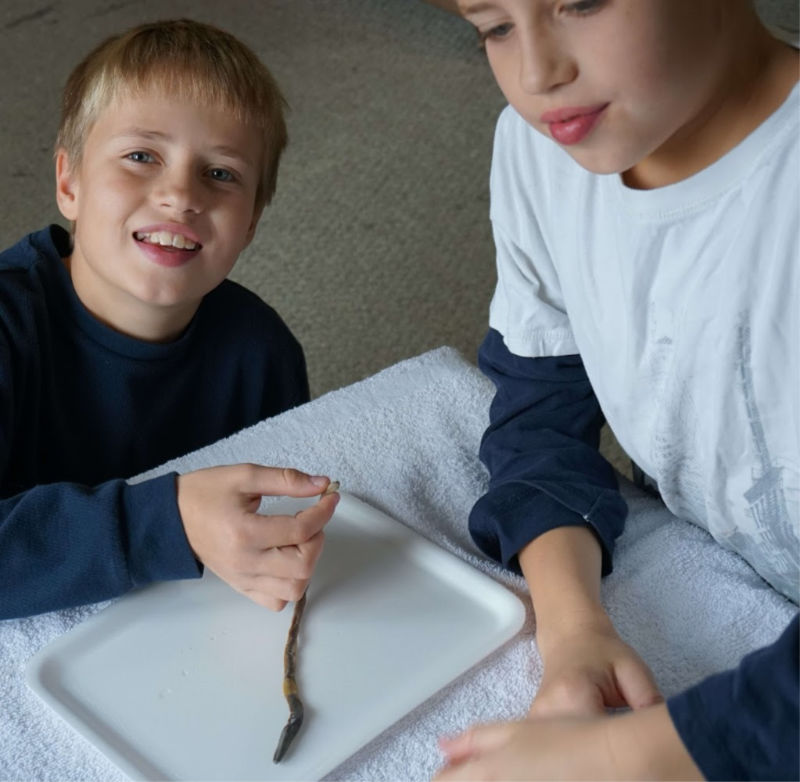
After we finished with the worm, discovering organs like the crop, ventral blood vessel, and even the ganglia, I was ready for a break.
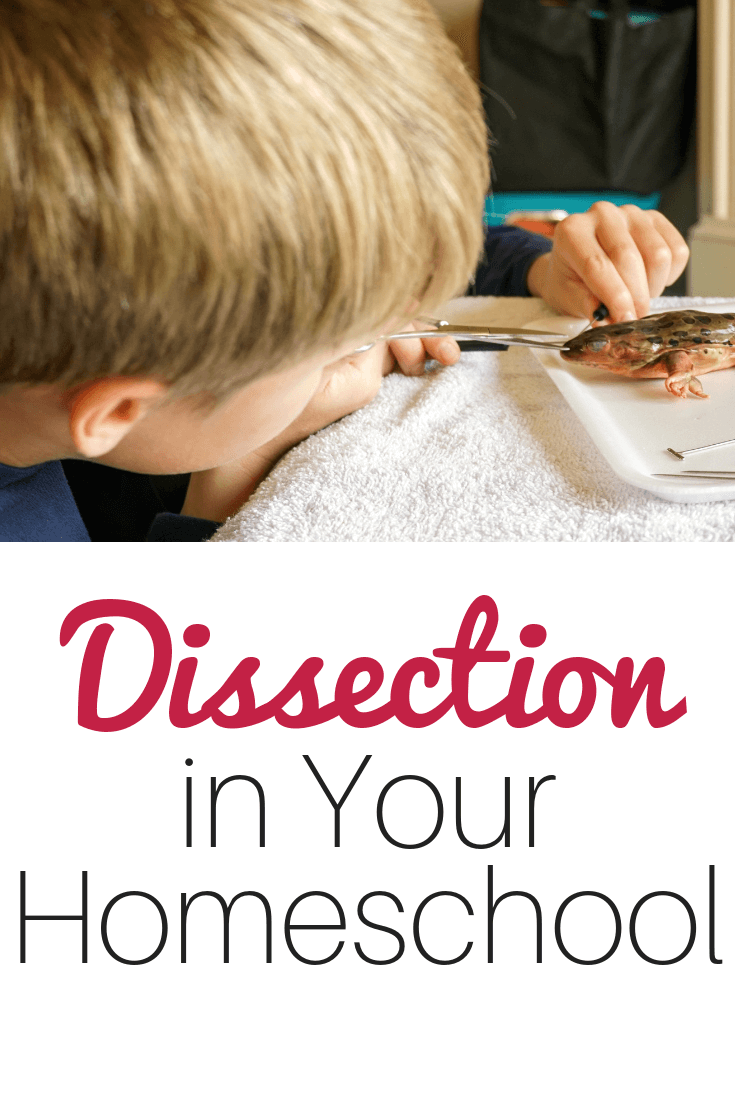
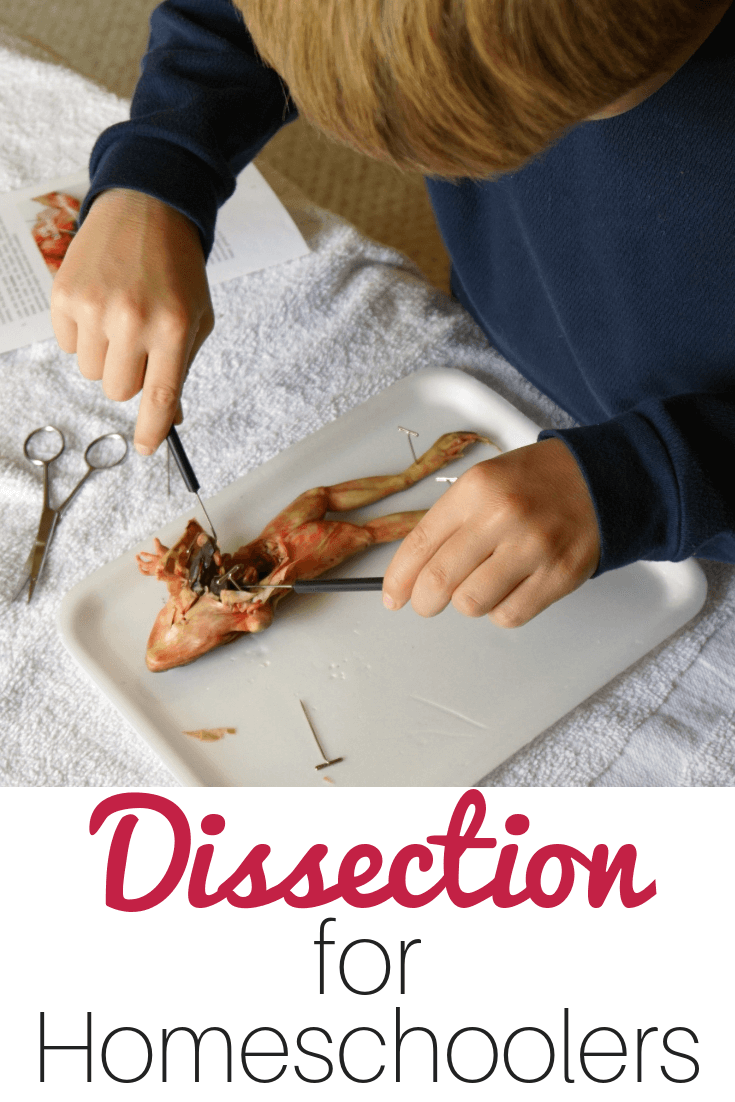
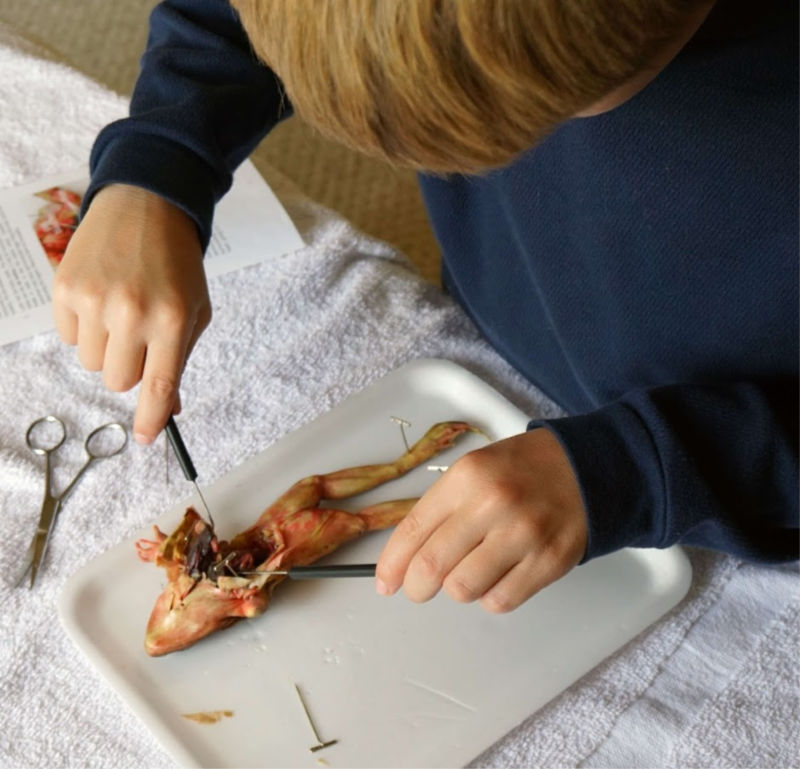 Thomas was pumped, and wanted to investigate the frog. (I think he really just wanted the chance to use the scalpel)
Once again, we went over the tools and safety rules. One thing I’d recommend is a box of disposable gloves (small or xtra small) and safety goggles, just in case. We didn’t use gloves, but stopped frequently to wash our hands.
Again, we took time to explore the external features of the frog before flaying it open. We discovered that our frog was a girl, based on the size of her tympanic membranes. Adam was sad that this seemed to be a leopard frog, since he’s caught them around our house.
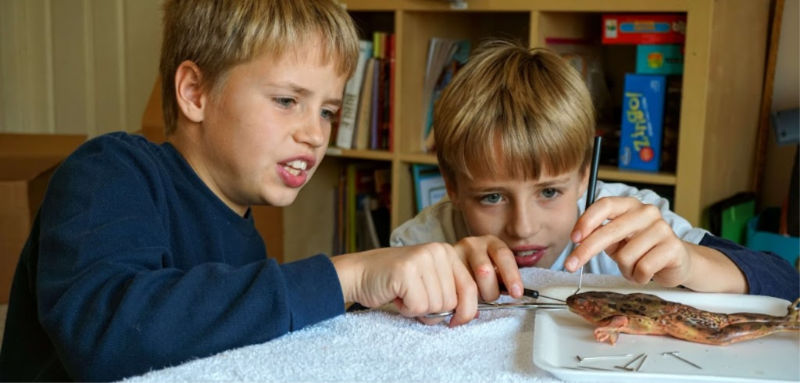
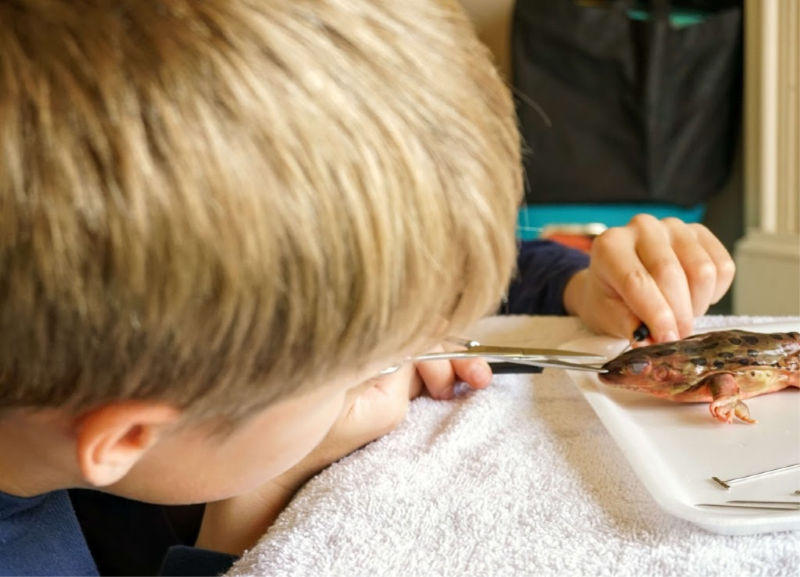
Dissecting the frog, as compared to the earthworm, was a little more difficult. It’s OK for a 10 year old, but know that they may need a bit of help. Cutting open the frog’s jaw was a two person job, and I actually took over for making cuts into the torso. I didn’t want Thomas to mangle all the organs inside.
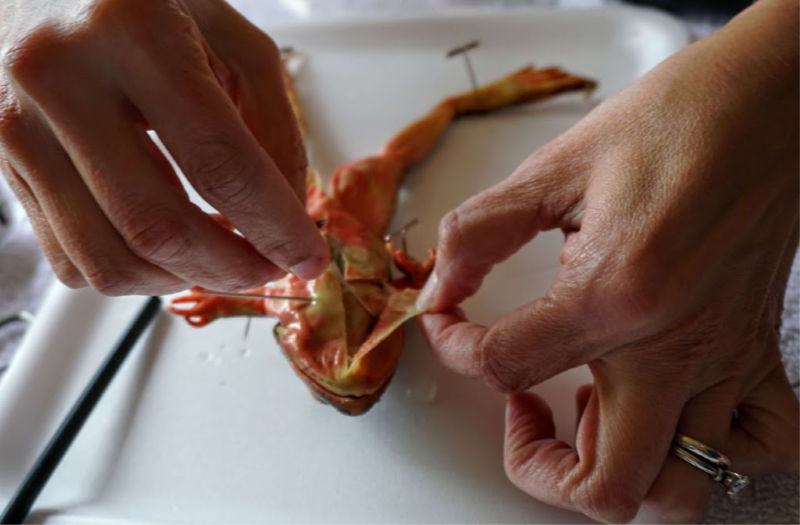
Once again, we used the dissection guide to investigate the organs. HST does a great job of describing the organs and their locations. I’d like a few more pictures in the guides for helping with identification.
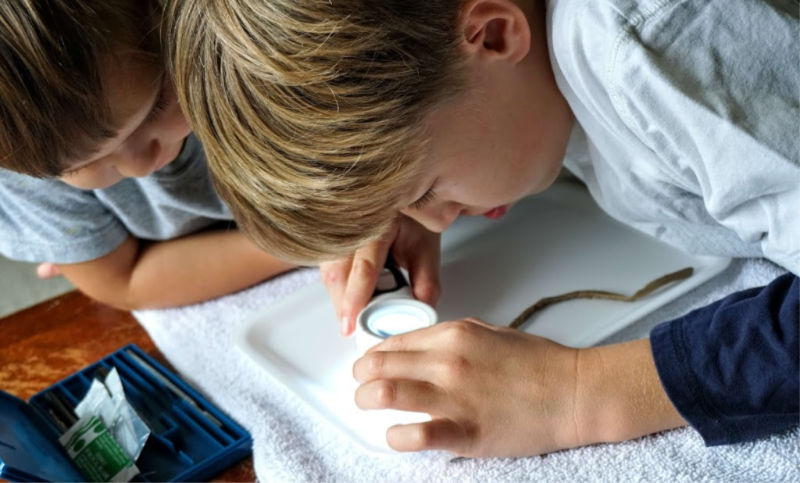
If you have a magnifying glass handy, this helps tremendously with examining tiny parts up close.
Preschoolers and Homeschool Dissection
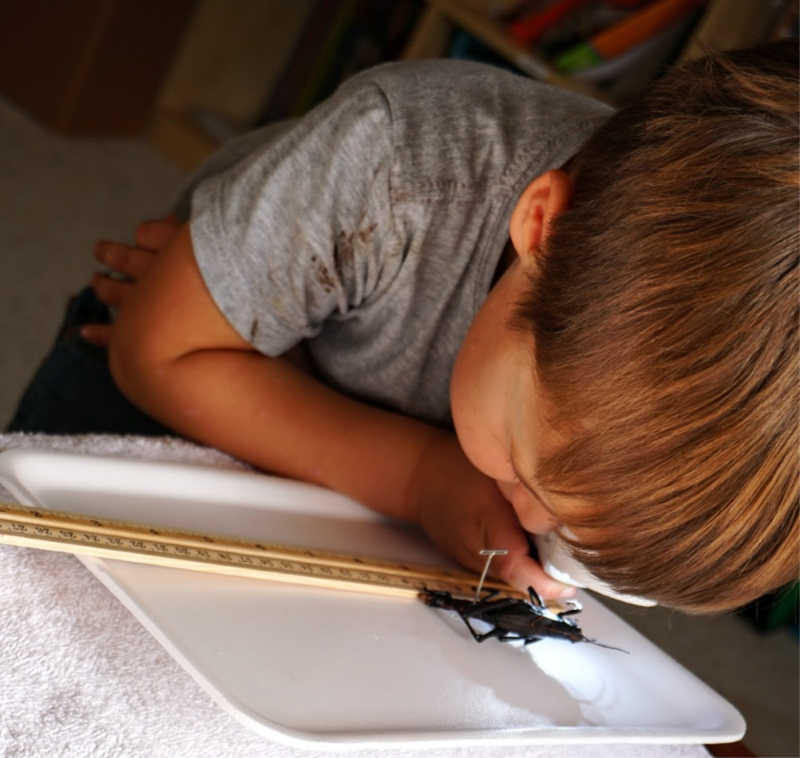
Once the frog was gutted, my boys took off outside. This left Daniel alone to investigate the grasshopper. Since he’s only 4, I took over for any work with sharp tools.
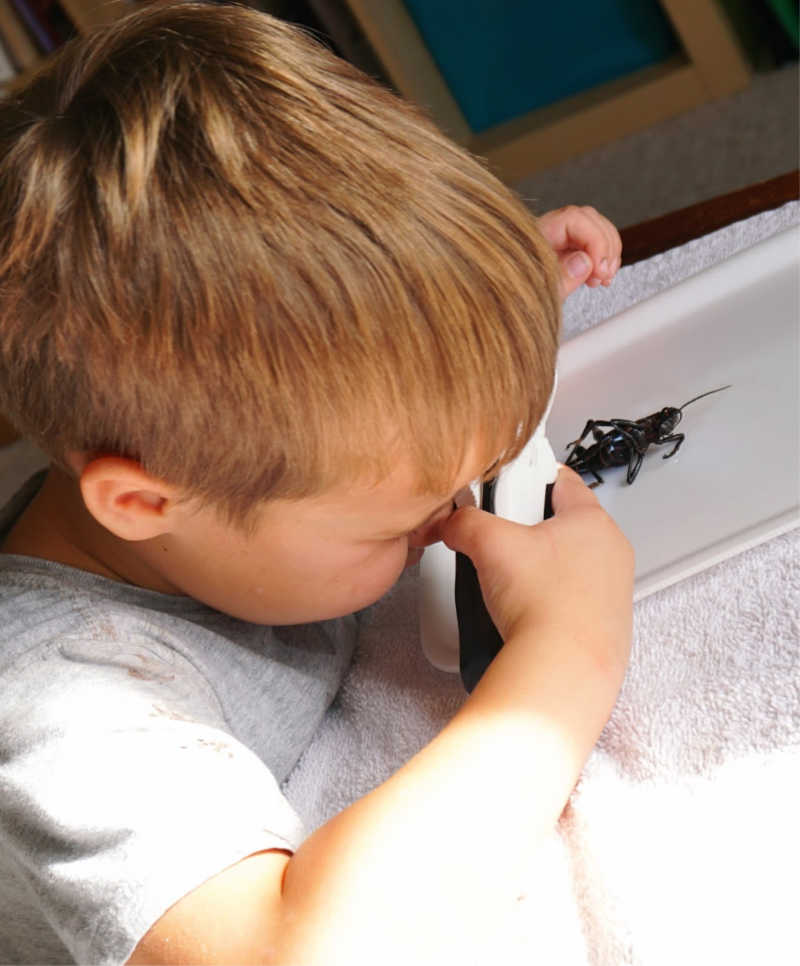
At this age, the external examination is fascinating work. Think of all the times your little guys have watched grasshoppers fly overhead or frogs hop into the creek? With a preserved specimen, we can take time to look at the insect’s compound eye, or peep at their powerful jaws.
Spending this science time was nothing short of amazing for my crew. They poured over the catalog from Home Science Tools, looking for more specimens for dissection. In the spring, we will be tackling the Intermediate Dissection Kit, which contains more specimens and a bigger tray. For the littles, we’re planning on an Owl Pellet kit.
What about your family? Are you planning to tackle dissection? I’d love to hear why, why not, and what specimens you plan to explore. Let’s chat!
My 7 year old was super excited when he saw me researching dissection kits, but I’m a bit nervous. I was a science major but for some reason looking at the pictures and the memory of formaldehyde is making me queasy. We will probably do the owl pellet, but I have a feeling my kids will want to do more. Which other ones do you recommend for that age?
The formaldehyde doesn’t bother me, but it makes my children lightheaded. We go outside — I take the specimen out of the packaging and rinse it with water. Then we work on the dissection on the deck if possible, or inside with plenty of windows and doors open.
My kids LOVE the owl pellets, as well as some of the fun kits like make your own bubble gum!